Home   Recipes   Tips   About & Contact  

we're just getting started, follow us on a delicious journey!

Wednesday, January 7, 2015

I've Moved

I've moved my blog to a new web page.  Visit me at:

www.sweetsuppertime.com

Thanks!  See you soon!

Tuesday, January 6, 2015

Fiesta Dip


Ya.  It's a bean dip. It's subtle in its difference to other bean dips and specific in requirement.  Don't use a can of re-fried beans and hope to get the same result as that expensive can of Frito Lay.  Skip the added mayo at your own risk.   These two ingredients along with an abundance of taco seasoning make this dip more of a fiesta that a mere dip.

Making this recipe brings back soooo many great memories for me and the fam.  Through the years we have had hordes of teenagers in our home.  We believe that the party should be at our house.  It's great to know where your kids are and who they are with.  The unexpected benefit to this?  After all the late nights and all the money you spend on food to keep them coming back you end up with kids who stop by to say "hi" even when your kid isn't home.  Or maybe they stop by to have a nap on your comfy couch.  Better still is when they stop by to visit because they just need a bit of advice.  Doubly good for you is if you are in the middle of bringing home groceries and a few of them pull up and start grabbing bags and putting things in the cupboards and in the fridge because they are that familiar with your home and they really want to help.

I have to say that I have the most awesome kids and they have the most awesome friends.  This dip is one that the kids and their friends request whenever they are planning a party or a game night.  There has been a lot of tortillas sacrificed on the alter of this bean dip over a game of Cataan or in between takes of a teenage movie making or watching night.  Have I mentioned how much I love my kids' friends?  I do.  These are people who know where I sit at the football game 10 years later and come to find me, give me a hug and show me the latest addition to their family.  Was it all in the dip?  Maybe.....

Spread a can of Frito Lay Bean Dip in an even layer on a platter.  My plate is about one and one-half the size of a regular dinner plate.  Mash a ripe avocado and carefully spread it over the bean dip.  Okay.  I have tried a can of re-fried beans to cut the cost back on this, but the fact it I just love the little can of bean dip.  It comes in a variety of "hot".  I love them all.   I watch for it to go on sale and I buy several at a time because, well..., it starts this little party. Frito Lay did not pay me to say that.
7 layer bean dip, bean dip, best bean dip

Mix 2 cups sour cream with 3/4 cup of mayonnaise and 2 1/2 to 3 tablespoons of taco seasoning mix.  Blend together well and spread over the avocado and bean layers.  I love what a bit of mayonnaise does to this recipe.  Straight sour cream gets a little tangy for me.  And I love going a bit heavy on the taco seasoning.  It's the star of this dip to me and it's what people ultimately start digging around for.  There was a time that I had to sneak the mayo out of the fridge and toss it in because I have a daughter who
hates  despises mayonnaise and all of its creaminess.  I have to say that I smothered more than a few snickers ( not the candy bar) when I watched her eat this dip and love it!  Is that mean?
7 layer bean dip, bean dip, fiesta dip

Okay, let's bring it home.  Top your lovely platter of deliciousness with 1/2 cup of cheese,
7 layer bean dip, bean dip, fiesta dip, sweetsuppertime

3 sliced green onions, one Roma tomato chopped and a handful of black olives sliced.
bean dip, 7 layer bean dip, super bowl dips, fiesta dip

Now hurry and put this in the fridge to let the flavors blend before your 15 year old runs in and does this to it...
7 layer bean dip, bean dip, fiesta dip

just to see if it "tastes good".  I love you Keven.  Seriously.  It wasn't anything the other kids haven't done.

Refrigerate for about an hour before serving.  Enjoy and make sure you have plenty of chips!
Fiesta Dip


Fiesta Dip by Sweet Suppertime 

 This dip is for making friends...

Ingredients
  • 1 can Frito Lay Bean Dip--you decide how spicy. I have tried them all and loved them!
  • 1 ripe avocado, smashed
  • 2 cups sour cream
  • 2/4 cup mayonnaise
  • 2 1/2 - 3 tablespoons taco seasoning mix.
  • 1/2 cup finely grated cheese.
  • 3-4 green onions sliced
  • 1 large Roma tomato, chopped
  • a handful of black olives, sliced
Instructions
  1. On a medium sized platter (mine is about the size of one and one-half dinner plates), spread the bean dip.
  2. Mash avocado and carefully spread on top of the beans.
  3. Mix sour cream, mayonnaise and taco seasoning together.
  4. Spread the sour cream mixture on top of the avocado layer.
  5. Sprinkle with cheese, sliced onions, chopped tomato and sliced black olives.
  6. Refrigerate on hour before serving to allow flavors to blend.
Notes
I go a little heavy on the taco seasoning. That middle part is what everyone is digging for.[br]I prefer the Mexican Blend cheese.

*** Dustin, Blake, Rob, Tom, Tanner, Tanner, Tanner, Andy, Spencer, Dustin, Elvis, Joe, Joe, Levi, Adam, Eddy, Brady, Brandon, Caleb, Josh, Josh, Luke, Harrison, Jake, Eli, Isaiah, Elvis, Jake, Danny, Michael, Keven, Kate, Lacey, Marcus, Rebecca, Maverick, Alta....stop by, I've got the fixin's.

Wednesday, October 8, 2014

Pumpkin Pie Spice Mix

Pumpkin Pie Spice
Pumpkin Pie Spice.  Even if I didn't bake I would want to own a jar of Pumpkin Pie Spice simply because it sounds so domestic and Fall-ish.  Since I do bake, and because so many recipes call for this combination of spices, it has become a staple in my kitchen.  I don't necessarily have an aversion to purchasing Pumpkin Pie Spice, although it can be pricey.    The problem rests in the fact that I go through so much of it that I always seem to be out.  I guess what I am saying here is that I make Pumpkin Pie Spice because I can. There are 5 spices that I combine to make Pumpkin Pie Spice; allspice, cloves, nutmeg, ginger and cinnamon.    A note about allspice.  My understanding of allspice is that, although it is it's own dried berry and NOT a combination of spices, it does closely resemble the combined flavor of  cinnamon, nutmeg and clove.  The reason this is important to someone like myself is that I am not deterred in making Pumpkin Pie Spice just because I am out of something like say...allspice.  I just add a bit more cinnamon, nutmeg and cloves in equivalent proportions.  There.  I hope I have convinced you not to put off making delicious things just because you are out of Pumpkin Pie Spice. Grab and empty jar and let's get started.
You will need the following:  Nutmeg, Ground Cloves, Ground Cinnamon, Ground Ginger, Ground Allspice.  These spices just make you happy!  Seriously.ingredients for Pumpkin Pie Spice
Into a bowl measure 6 Tablespoons ground cinnamon, 4 teaspoons ground ginger, 4 teaspoons ground nutmeg, 1 teaspoon ground allspice and 2 teaspoons ground cloves.  They look so beautiful in the bowl don't you think?
pumplin pie spice measured ingredients
Grab a fork and give it a stir until the spices are nicely incorporated.  Store in an airtight jar to keep all the aroma and flavor tucked nicely away and get busy making those pumpkin cookies or rolls or pie or bread.....and remember you made this just because you can.  Happy baking!

Pumpkin Pie Spice
Author: Sweet Suppertime
I love making large quantities of this to keep me from running to the store!
Ingredients
  • In a bowl combine:
  • 6 Tablespoons ground cinnamon
  • 4 teaspoons ground ginger
  • 4 teaspoons ground nutmeg
  • 1 teaspoon ground allspice
  • 2 teaspoons ground cloves
Instructions
  1. Mix together and store in an airtight container.

Monday, February 24, 2014

Simple and Savory Focaccia Bread


The weather turned cold and foggy yesterday, and there is nothing like a cold and foggy day to inspire you to put on a pot of soup.  And there is nothing like being up to your elbows slicing and dicing veggies for your soup to make you cast all your cares to the whirling wind outside and make a batch of bread to go with it.

I won’t claim that this is the most authentic focaccia bread; but I will claim that it is simple and savory and it mops up soup or balsamic vinegar and oil like a champ!  If you happen to have any leftover, this bread makes a delicious sandwich. Good luck with that...

Proof 1 Tablespoon active dry yeast in 1 cup warm water {about 100-110 degrees Fahrenheit}.  Give it a swirl or stir and add 1 Tablespoon of sugar.  Just sprinkle it evenly over the top.


Yeast will become bubbly. Ours took about 7 minutes and looked like this:


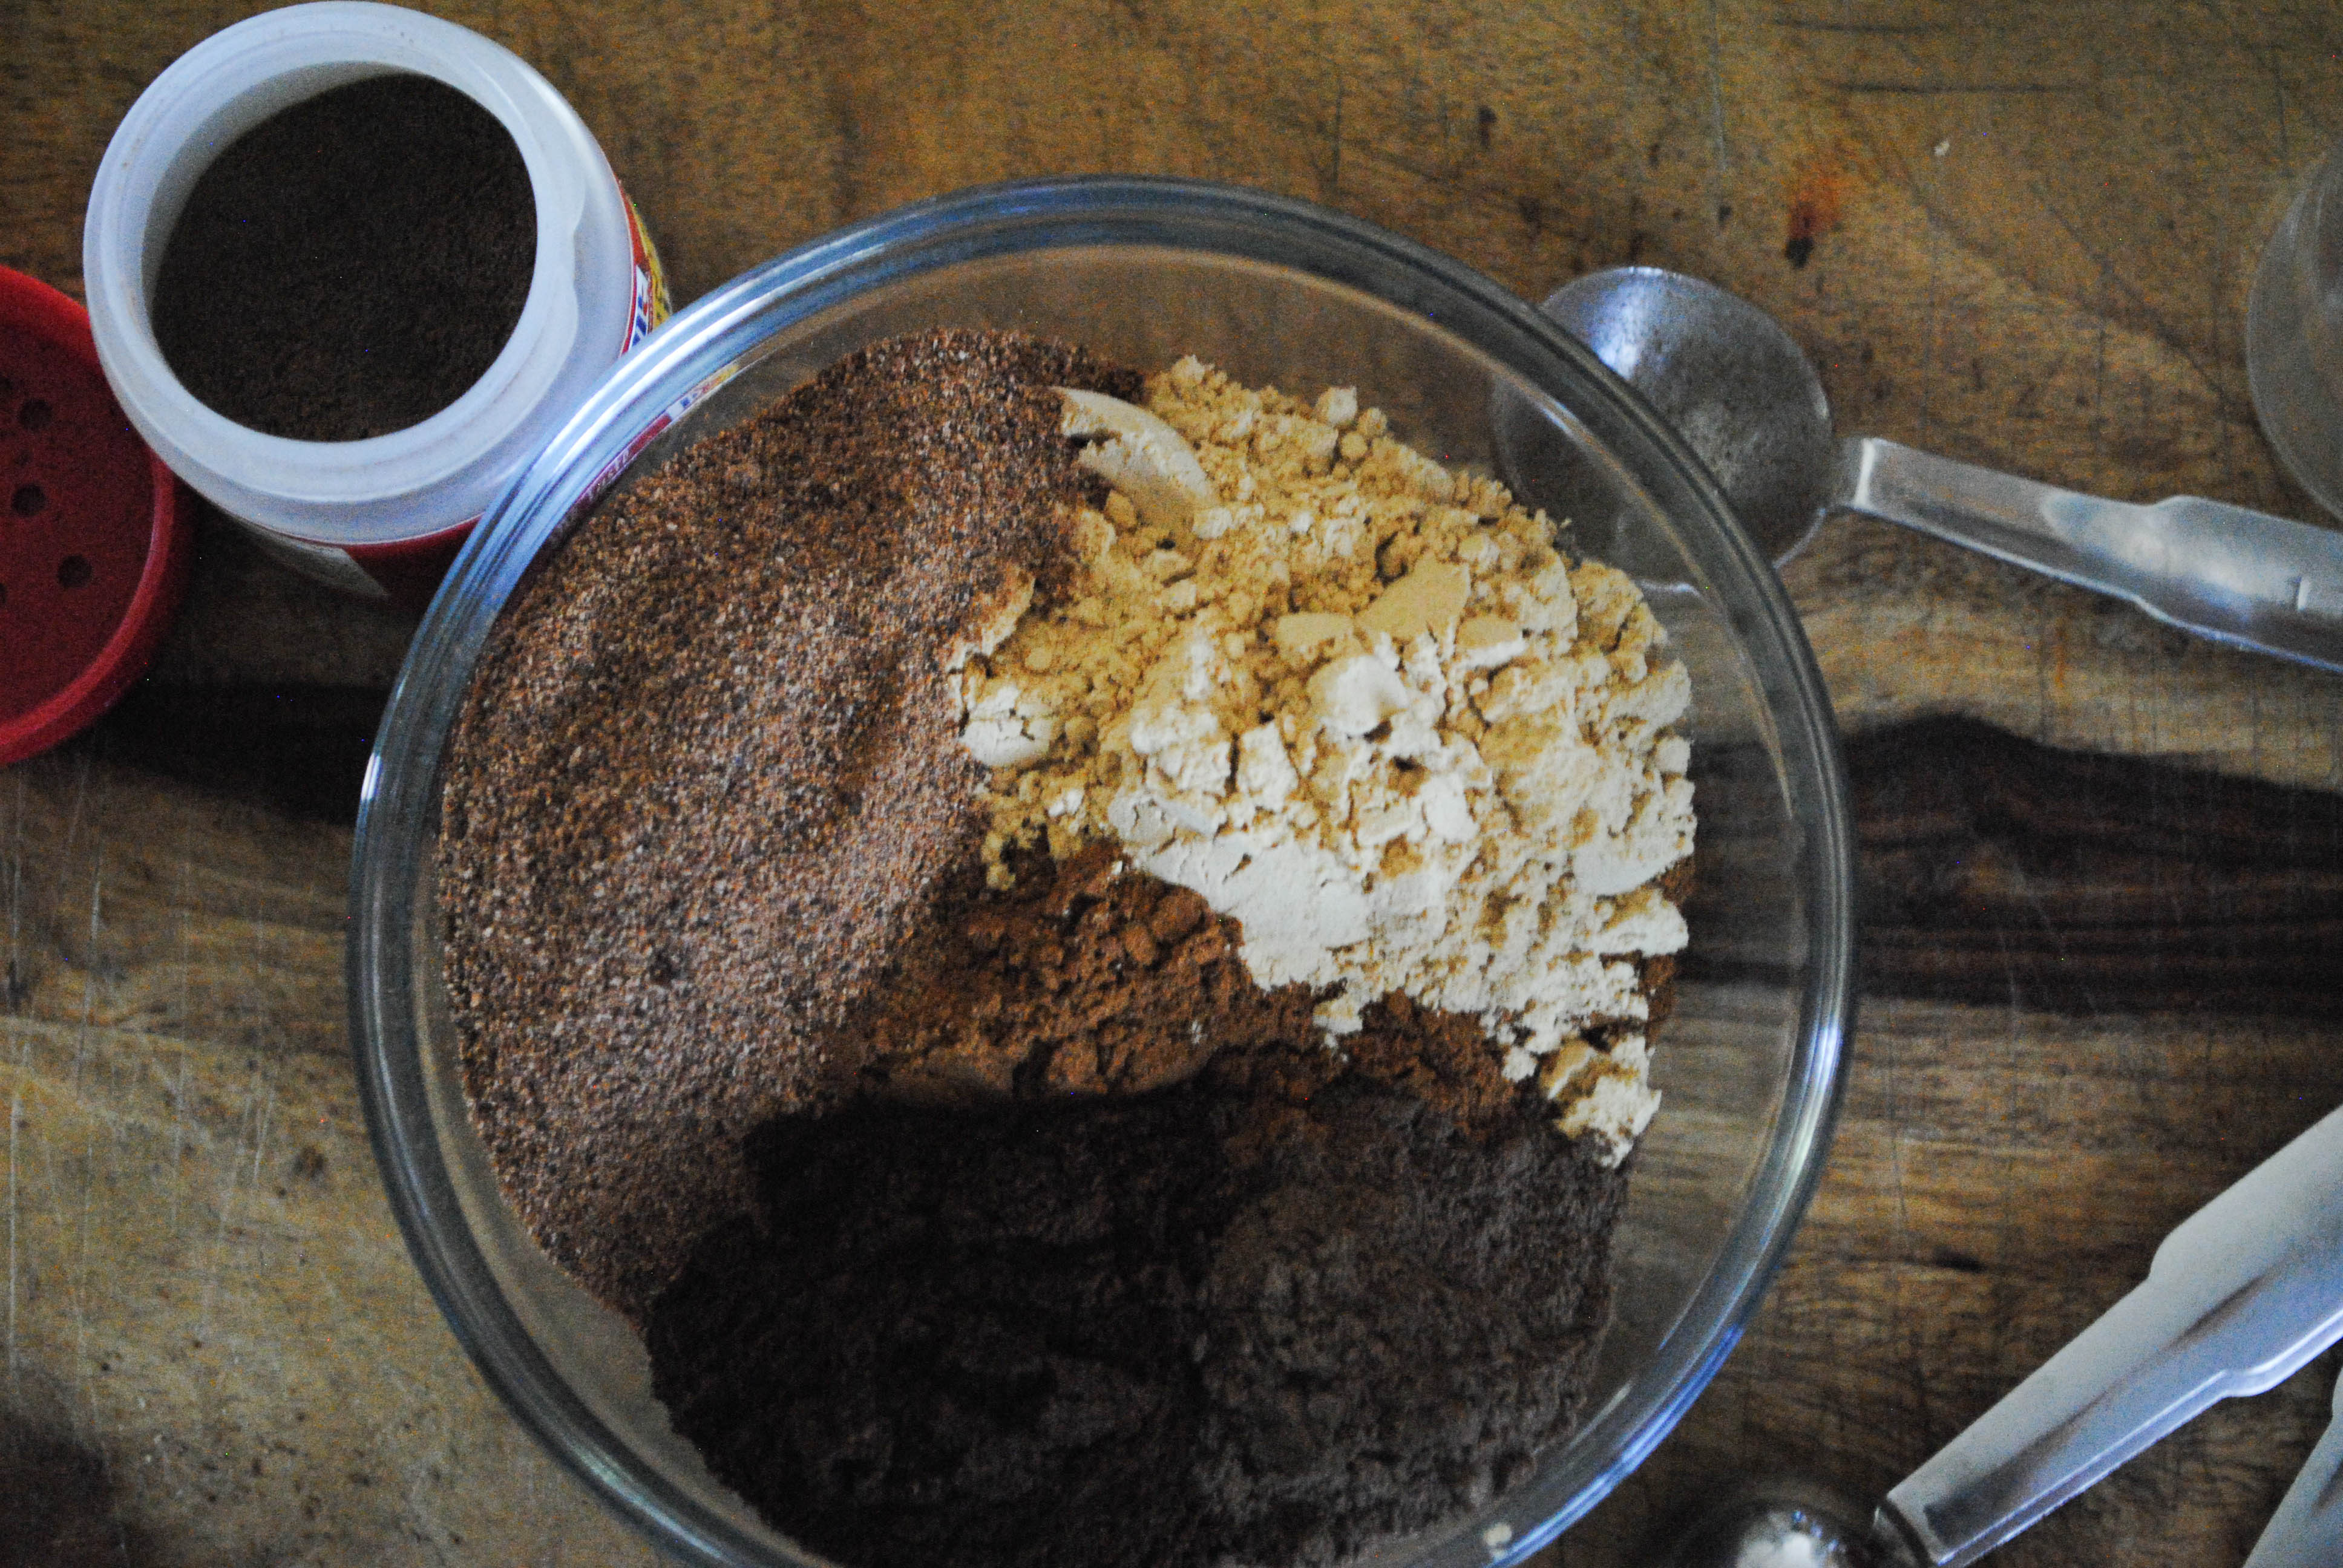
While yeast is proofing, mix 2 1/2 cups flour, 1 teaspoon salt, 1 Tablespoon of olive oil, and 1 Tablespoon of crushed rosemary.


We'll add additional rosemary, red onions, and salt to the top of our bread
before it goes in the oven.  I like to get them prepped now.


Add flour mixture to proofed yeast and knead for five minutes in a mixer or ten minutes by hand.
Dough should be soft and smooth but not too sticky. 
Transfer dough to an oiled bowl and cover with plastic wrap.

>

Dough should raise until doubled in size, about 30 minutes.


Punch down the dough and separate it into two equal pieces, place on baking sheet, and use your fingers to make crater-like indentations in the top of the dough.


Cover with a cloth or plastic wrap an allow the dough to rise until doubled in size, about another 30 minutes.

While dough is raising, sauté 1/2 medium purple onion, sliced,  in a small amount of oil until just wilted. 


Garnish loaves with remaining (1 Tablespoon) crushed rosemary, sautéed onions, and salt before putting into the oven. ** You may like pushing the garnishes deep into the bread before the second rise.  There is really no wrong way to do this--simple and savory.  Be creative.  Just make sure it gets it's second rise!


Bake at 375 for 15-20 minutes or until golden brown.
We added cheese to one of our loaves(at the end of the baking process) and broiled it for about a minute until it was bubbly. Remove the bread from the oven and drizzle with an additonal 1 Tablespoon of olive oil. 


The actual labor time for this recipe is so small, but you do need to pick a morning or afternoon when you are around to meet the raising and shaping requirements.  Stormy days lend themselves to this recipe. Sun-dried tomatoes are a great topping for this bread as well.  Go grab the olive oil and balsamic vinegar and do a bit of taste testing; there are two loaves after all! 


Simple and Savory Focaccia Bread  by Sweet Suppertime

1 cup warm water 
1 Tablespoon active dry yeast
1 Tablespoon sugar
2 1/2 cups flour
1 teaspoon salt
1 Tablespoon rosemary, crushed or chopped
1 Tablespoon olive oil

Topping
1/4 teaspoon sea salt
1 Tablespoon rosemary, crushed or chopped
1/2 purple onion sliced
olive oil for sauteing the onion
optional: grated cheese of your choice


Keeping the temperature of the warm water at around 100 degrees, add yeast and sugar to water and set aside for about 7 minutes or until bubbly.
While the yeast is proofing combine flour, salt, rosemary and olive oil in a bowl.
Once the yeast has become bubbly, add the flour mixture to the yeast mixture and mix for five minutes if using a mixer or 10 minutes if kneading by hand.  Start the mixer slowly so that you don't splash your flour all over and then increase it to a speed where the motor is not laboring.  On my KitchenAid I started on 1 and moved up to speed 3.  The dough should form a nice ball and be soft but not sticky.  I usually reserve about a 1/4 cup of the flour to add as the dough mixes.  It's so much easier to add flour than water!
Lightly oil the top of the dough and cover with plastic wrap and allow the dough to rise until it doubles in size.   About 30 minutes.
If you are going to top the Focaccia Bread with any toppings, this is a great time to prepare the toppings.  For this I sliced 1/2 of a purple onion and sauteed it in olive oil on medium heat until the onion had just started to wilt.  Have your rosemary and salt handy for topping your bread after it finishes it's first rise and you shape it.
Once the dough has risen nicely, divide the dough into two balls and pull the edges in to form a ball.  You can bake this in any pan, today I liked placing it on parchment, freestanding,.  Place the dough balls on a large baking tray on opposite ends of the pan so that when they raise during baking they don't fight with each other.  Push your fingers deep down in the dough to form the traditional look of focaccia.  Now you are ready for the second rise.**  Cover with plastic wrap and allow to rise for about another 30 minutes, or until double.
Bake at 375 for 15-30 minutes or until golden brown.  If I am adding any kind of cheese ( which I like to do because it holds all those yummy onions together)  I add it during the last 5 minutes of baking.  If it isn't as crisp as I would like the cheese to be I broil it for about 1 minute
Serve this up with soup or delicious olive oil and balsamic vinegar.  My favorite right now is a mango balsamic with an herbed olive oil.  


**You have three choices for garnishing;
1.  Either garnish before the second rise, pushing the toppings down into the bread or
2.  Wait until the loaves have had their second raise (doubling in size) and add the garnishes right before oven time.
3.  Don't garnish at all

Side note as you decide to branch out here-- try putting the dough in a round or square cake pan and dousing the bottom of the pan liberally with olive oil.  It makes the crust crispy and 


Thursday, December 26, 2013

The Best Fresh Salsa


This Christmas Eve, as our family gathered around the table, we felt the all too familiar absence of one of our brothers. Over the past eight years they’ve been scattered from California to Ukraine serving two year LDS missions. While a two year absence is never easy, it becomes especially poignant around holidays, birthdays and other events like championship baseball or football games. This Christmas marked the first of two Christmases without Danny who is serving in Mexico City.

 He called us via Skype from a small internet café and we got to see his face for the first time since we sent him off in June. He looked handsome and happy, and it was fun to hear more details about the stories we’ve read in his emails. So in honor of Danny we switched up one of our traditions this year. Instead our of usual Christmas Eve dinner we went with a Feliz Navidad theme. We made bean dip, guacamole, rice, delicious taco chicken, and topped it all off with our favorite fresh salsa.

This salsa is a weekly staple. It can be altered a bit depending on your tastes. Sometimes we’re feeling super spicy, other days we’re a little more mild. Whatever your preference this recipe delivers delicious {and beautiful} results every single time.


 In this recipe we use a combination of canned and fresh tomatoes. In this batch we ended up with some gorgeous heirloom grape tomatoes that added beautiful color to the salsa. However we've used everything from romas to beefsteaks and its delicious every time.

In a food processor blend the fresh tomatoes with 1/2 of sweet onion and 1/4 of a purple onion and jalapeno pepper.  To make our salsa more salsa-ish and less like pico de gallo, we blend the drained, stewed tomatoes in the blender before adding it to the fresh tomato/onion mix.


Next add cilantro, salt, pepper, garlic, and cumin. You can squeeze in some fresh lime juice here if you'd like.  Try and resist opening a bag of tortilla chips for about 20 minutes to let the flavors blend.  Pour into your favorite fiesta bowl and enjoy!


The BEST Fresh Salsa

1 C. of fresh tomatoes
1- 12oz can of stewed tomatoes drained
1/4 of a medium sized jalapeno pepper 
1/2 of a sweet onion
1/4 of a purple onion
3 tsp minced garlic
1/2 tsp cumin
2 tsp salt
1/4 tsp black pepper
1/4 C. chopped, fresh cilantro

Add fresh tomatoes, purple onion, and sweet onion to food processor and blend to desired consistency.  In a blender, add the drained stewed tomatoes and blend until smooth and combine with the fresh tomato-onion mixture.  Add garlic, cumin, salt, pepper, and chopped cilantro.  Allow flavors to blend for 20-30 minutes before serving.

Thursday, December 5, 2013

White Chocolate Covered Popcorn

Christmas popcorn, Christmas treats, sweet suppertime

It doesn't get any easier than this! ( And yes, I realize that these are in the same classification of Rice Krispie Treats.)  No judging until you have tried them!  This popcorn treat is fun to make, fun to eat, fun to package, fun to vary, fun to give away, fun to keep.....well you get the idea.
This summer I attended the wedding reception for the son of a good friend of mine.  As we left they had adorable popcorn cartons filled with the most delicious variation of popcorn mix that I had ever seen.  Then I tasted it and fell in love.  Your imagination is literally your only limitation with the mix.  For the Christmas Season I have used mint creme candies, crushed candy canes, chocolate coated candies and chocolate covered pretzels.  At Halloween I love to toss in candy corn or/and pieces of caramel.  Sometimes I drizzle milk chocolate for added color.  I had a dream the other night that I started with a layer of potato chips, milk chocolate, popcorn, white chocolate, pretzels etc.  Yes I dream food! This is a great last minute party treat and a super delicious neighbor gift at Christmas!

This is how I made mine today...

Christmas Treats, sweet suppertime

Pop one 3.3 oz butter flavor popcorn in the microwave and pour out on a large jelly roll pan covered in parchment or wax paper.  Remove all unpopped kernels. My mom had a handy Tupperware that could do this job but alas I had to use the hunt and peck method.
Now it's to add all the the nummy treats to the top of your popped corn!  Reserve a few of your smaller treats to add to the top after you have drizzled your white chocolate.  When I make mine I sort of break the pan into sections, putting different treats in each section so that when I put them in a bowl or package it all up it looks like there is a lot of variety.

Christmas Popcorn

Now comes the super fun part; melting and drizzling the white chocolate.  Pour 1 package (12 oz) of white chocolate chips in a microwave safe bowl (I like glass).  This is how I melt mine;
Microwave on half power for one minute.
Remove and stir once.
Microwave on half power for another minute.
Remove and stir a couple of times.
Microwave on full power for 30 seconds.
Stir until smooth and start drizzling baby!  I like using a metal tablespoon (dinnerware style) to do this.
Now, be generous and get a good coating on this as the chocolate is what binds it all together.  When you have it all nice a pretty, toss on those reserved candies to add color and texture to what the eye sees before the mouth consumes.

Christmas Popcorn, Gift Ideas


Let your masterpiece sit for 30 minutes while the chocolate dries.  Gently break it in to pieces for serving.  It goes a bit like this at my house; one for the bowl, one for me, one for the bowl, a bite for me... this usually yields 1/2 bowl and one happy tummy. :)  If that's the case wrap it up pretty and give it to someone you REALLY like.


White Chocolate Covered Popcorn by Sweet Suppertime

1  3.3 oz. bag butter flavored microwave popcorn, popped and unpopped kernals discarded
1 12 oz bag white chocolate chips
Candy of your choice such as:
chocolate coated candies
chocolate covered pretzels, broken in large pieces
chocolate mint cremes
crushed candy cane...the possibilities are endless

After popping the popcorn, pour it out on a large jelly roll pan covered with wax paper or parchment.  Sort through the popped corn and discard any kernels that have not popped. Spread out evenly on the pan. Sprinkle your desired candies on the top.  Be as generous as your taste buds and budget allows. Reserve a few candies to place on top of the finished product.
Melt one 12 oz package of white chocolate chips in the microwave in a microwave safe bowl.  Use half power for in minute in the microwave, remove and stir.  Microwave for an additional minute on half power, remove and stir.  Microwave one last time on full power for 30 seconds.  Remove and stir until smooth, then quickly drizzle over the prepared popcorn and candies.  You will want to use the entire bag of white chocolate as this is what holds the popcorn bark together.  Sprinkle any reserved candies on top and allow to cool and dry for 30 minutes.
Gently break into pieces and enjoy!  (and maybe even share)

Tuesday, November 26, 2013

Momma's Bread

Homemade Bread, bread, sweet suppertime

Do you know anyone who does not love the smell of homemade bread?  Do you know anyone who would turn down a warm slice of bread slathered with homemade raspberry jam?   Me neither!
I am so lucky because my mother taught me to make bread at a very young age.  In fact, I have so many fond memories of homemade bread with my mom that I am having a hard time choosing which one to put down for the sake of this blog collection.  Is it the countless times that I walked through the door after school to the comforting smell of homemade bread?  Is it the feel of the dough in my hands or watching her hands knead and shape the loaves?  Is it watching her slice off a piece and then listening to my brothers tease her about how she just couldn't cut the loaf straight?  
Ultimately what I would love to remember my whole life and what I would love for my own children to know is that for years she never used a recipe and she didn't have a machine to do the kneading.  She had a small sauce pot that, I would imagine, held about 2 cups of flour and she used her silverware to measure with.  She didn't measure the temperature of the water she was proofing yeast in and she didn't measure anything.  I can see her in my mind working over the dough adding cups, dashes and sprinkles.  I see her swirl the bowl with warm water after sprinkling the yeast and a dash of sugar so that the water would contact the yeast without necessarily stirring it.  And I see her pinch at the dough and feel it to see if it feels just right after adding the last bit of flour.  "Come here Shanon," she would say, "feel the dough... this is how is should feel."  To this day I love the feel of a good dough and my hands tell me long before my taste buds do if the dough was done right.
Then she was asked to teach a class at church about bread making.  I could not for the life of me figure out why she seemed so concerned about this.  She was, after all, the master at this! She worried and fretted and made batch after batch.  She was working out the measurements so that she could send the ladies home with a recipe.  I wonder how many neighbors received a loaf of her bread during the weeks that led up to that class?  The recipe that follows is the culmination of her efforts.  Later in life my dad bought her a Braun mixing machine.  I am happy that, before she taught me to make bread in that machine, she taught me to make it by hand.  For the sake of this post, I made the recipe by hand and my biceps and abs (for some reason) are feeling it today!  You can easily use your machine to do this, but I have to say it was pretty fun to do all by myself.  The thing I think everyone should understand about making bread is that even ugly bread smells and tastes good.  Practice makes perfect (until you need a great photo or somewhere special you needed to take it :)

To start your bread making, scald 2 cups of milk in a saucepan.  To me this means that the milk starts to form bubbles around the edges or forms a thin film on the top layer.  Remove the pan from the stove top and add 2/3 cup shortening 2 1/2 Tablespoons salt and 6 Tablespoons sugar.  Stir until the shortening is melted and the sugar and salt are dissolved.  Add one cup cold water and set this aside to cool a bit.

homemade bread, bread, sweet suppertime

Yup!  That's a Mickey Mouse scraper, he's my bud.

While the milk mixture is cooling a bit, let's proof the yeast.   In a glass bowl measure 1 cup of warm water.  I like to put water in the bowl and warm it up a bit before I actually put in the warm water I will be using to proof the yeast.  It's a quirk.  Anyway, if you want to take the temperature of the water you are using you will want to keep it around 100 degrees.  If you feel adventurous and don't want to take the water's temperature, hold your wrist under the running water until it feels nice and warm but not hot.  Hot will kill the yeast.  Put one cup of warm water in your glass bowl and then sprinkle 3 Tablespoons of active dry yeast over the water.  Add 1 teaspoon of sugar to the yeast mixture to feed the yeast.  Swirl the bowl or give it a quick stir.  Just one.  Then set it aside to get it all nice and foamy.  It takes about 8 minutes or so.  Put it in a nice warm place.  It is the king of this process!

shanon balser, sweet suppertime, proofing yeast

Working with a bowl that can easily hold 10 cups of flour, pour the warm (but not hot) milk mixture into the bottom.  Add the yeast mixture and 7 cups of flour.  Stir to incorporate the flour.   Add 2 of the 3 remaining cups of flour and begin working the dough with your hands.

bread by hand, homemade bread, bread, sweetsuppertime

 Now it's your choice whether to keep working in the bowl or live dangerously and work it on the counter.  You have about 10 minutes to spend with this guy, so get comfortable.  If the dough sticks to your hands, sprinkle the last remaining cup of flour, a little at a time, onto your dough and work it in.  Most likely you will need the whole cup.

bread, kneading bread, sweet suppertime

 I like working the dough on the counter after I have gained control of the dough in a large bowl.  Folding the dough like a package, bring the edges in to the center over and over again.  Pull and stretch the dough.  This is where you form the necessary gluten that makes the dough light. Work the dough in this manner for about 10 minutes until bubbles of air form and pop.

Form the dough into a ball, brush with oil, cover it with a clean dish cloth, and leave it to rest and raise for about 45 minutes, or until it doubles in size.

bread, sweet suppertime, shanon balser, homemade bread

While the dough is rising grease 3 large bread pans both on the bottom and sides.  I like using wax paper or parchment. Momma always kept a piece inside her shortening container for such uses.

homemade bread, bread

Punch down the dough.  This is my kids' favorite part; punching down the dough for me.  Divide the raised dough into 3 equal parts and shape them into loaves.  There is really no magic to this.  Some people shape it into a rectangle and roll it up.  I fold the dough in on itself just like when I am kneading it.  Grabbing the top in my fingers I roll it back and forth on the counter to smooth the top and shape it into a nice roll that matches the size of pan I am using.

homemade bread, bread, sweet suppertime

Place the shaped loaves in the prepared bread pans and brush with oil.  Cover with a towel and once again place in a warm spot to raise until double or reaches the top of the loaf pans.  This takes about 45 minutes. After about 30 minutes, preheat your oven to 350 degrees.

sweet suppertime, homemade bread, bread


Now it's time to bake the bread/masterpiece.  Place the loaves of bread on the center rack of the oven at 350 degree  for about 35-40 minutes or until the loaves are golden brown.  Remove from the oven and  place on a cooling rack.  I like to brush the top of the loaves with butter.

sweet suppertime, homemade bread, bread

Now it's time to call the family and get out the butter and jam.  Actually I never have to call the family... the smell of fresh baked bread summons them all on its own.  This is a baking project well worth the time!  Enjoy one loaf right away and take another to a neighbor.  No worries there is still one left for supper.
sweet suppertime, homemade bread, bread recipes


Momma's Bread Recipe  by Alta Chamberlain for Sweet Suppertime

Scald two cups of milk.  Remove from heat and add 2/3 cup shortening, 6 Tablespoons of sugar and 2 1/2 Tablespoons of salt.  Stir until shortening, sugar, and salt are dissolved.  Add 1 cup cold water, stir.
Dissolve 3 Tablespoons yeast in one cup warm water with 1 teaspoon sugar, and let rise to a foamy sponge
(about 8-10 minutes).
When the milk mixture is lukewarm, add yeast and seven cups of flour  (momma used all purpose flour, feel free to use bread flour). Stir briskly until blended (about 1 minute).  Add remaining 3 cups of flour and knead until the dough is smooth and air bubbles form and pop. This should take about 10 minutes.  You may need to add additional flour if the dough is too sticky, but don't add too much as the dough will become stiff. Moisten the top of the dough with oil.  Cover and let rise until double in bulk.
Shape into loaves and place in greased bread pans.  Cover and let rise until the center of each formed loaf has raised to the top of the bread pans.
Preheat the oven to 350 degrees.
Bake on center rack for approximately 35 minutes or until golden brown.  Remove and brush with butter if desired.
Makes 3 loaves.

Note:  Momma used all purpose flour and sometimes used half wheat flour and half white flour.  I use bread flour and love making the half and half as well.

Monday, November 4, 2013

Raisin Filled Cookies

sweet suppertime, raisin filled cookies

Early in the spring I asked my mom to write a post for my recipe blog.  I asked to her to review some of her memories of childhood and write, for me, a memory.  The following post is hers.  She mailed this to me in the spring and I called her to tell her that I had gotten it and to thank her for sharing this memory.  She told me, "Shanon, I would like you to publish it in the fall.  I won't be here, but the story would be best suited for the fall."  My mother passed away in late August and I have watched the leaves change and drift to the ground.  Still I have procrastinated publishing this piece.  I've enjoyed seeing the letter perched on my dresser these last months.  It's a connection to her and somehow in publishing her recipe and memory, I feel like I am moving on and I'm not sure I like that feeling.

 With that being said.... here is my mother's memory:

My favorite time of the year has always been early autumn when nature steps out in an array of brilliant colors; but I also enjoy late autumn when the leaves start to fall and the air becomes chilly.  By this time the harvest had been safely gathered in and it would be time for the final preparations for winter and Hog Butchering time.  Probably that doesn't sound exciting to folks today, but with a fresh supply of lard, we knew our winter days would be filled with the smell of doughnuts frying or raisin-filled cookies baking.

My Dad would carefully trim all the fat from the meat and cook it in a large kettle on our wood burning stove.  I bet some of you have paid good money for commercial "pork cracklings" from this process.  The melted lard was then poured into crock jars, sealed and placed in a cool spot for winter cooking.  The best cooks today know that pure lard makes the flakiest pie crusts and pastries.  My mom made doughnuts and cookies by the dozens and the remaining ones were put in a heavy roasting pan placed on the bottom shelf of her cupboard where everyone could find them.  My very favorite was her Raisin-Filled Cookies.  Many years ago I copied this from my Mother's old worn, torn, almost unreadable notebook.  

Filling:

Combine 1 cup sugar with 3 Tablespoons of flour in a medium size mixing bowl.  Add 1 1/2 cups raisins and toss to coat. 
FSweet Suppertime, Raisin Filled Cookies


Bring one cup of water to a boil.  Add the flour, sugar and raisin mixture to the boiling water.  Reduce the heat and simmer until thickened; approximately 3 minutes.  Cool completely. Refrigerate overnight if desired.

sweet suppertime, raisin filled cookies


Cookie Dough:

Cream together 1 cup lard(I used shortening)and 1 cup sugar. 
Add 1 egg and beat well.


Sweet Suppertime, Raisin Filled Cookies

In a separate bowl combine 3/4 cup whole milk with 1 teaspoon of vanilla.  In another bowl combine 3 1/2 cups flour with 1 teaspoon baking soda, 2 teaspoons baking powder and 1/2 teaspoon salt.  Sift together.

Sweet Suppertime, Raisin Filled Cookies

Add the flour mixture alternatively with the milk mixture to the creamed mixture until incorporated.  

Roll the dough very thin on a well-floured cloth and cut into rounds.

Sweet Suppertime, Raisin Filled Cookies


Place a teaspoon or more of the filling on half of the rounds,


Sweet Suppertime, Raisin Filled Cookies


 top with remaining rounds and press edges together. 


Bake 375 degrees 12 minutes or until slightly golden on the edges.  Do not over bake.

Sweet Suppertime, Raisin Filled Cookies

Store in an airtight container or an old roaster on the bottom shelf where all the people you love can reach them. These are always better the second and third day as the dough on the cookie softens. Full recipe at the bottom of this page!

(Shanon, did you know the rest of the "lard" story?  Just for your information: When some of the first settlers came to this area, they found that the hollow to the west and north part of town was covered with grasses, sagebrush, oakbrush, with a stream running through it.  But it was also full of rattlesnakes.  Since pigs can kill rattlesnakes, the settlers would put all their pigs in this spot from springtime until late autumn.  Then the men and boys would 'holler' to the pigs and most of them would come and the others were found and taken to their separate shelters.  Some called this area "Hog Holler" and others called it "Hog Hollow."  It didn't matter as both names were familiar.  An LDS church house was later built on part of this area; and at the dedication of that Chapel, the original names were researched and mentioned in a talk by one of the Stake Presidency.  It brought back memories for us old timers; but "comers"didn't appreciate that name for their church or address.  Today the Chapel and area is appropriately named Temple View and it still gives a magnificent view of the whole valley.)

So, there you have it; my mother's memory of raisin filled cookies.  I'm so glad she put this memory in writing for me and so glad she showed me around the kitchen.  As I worked on these I could almost hear her giving me little bits of advice and tips to make them turn out just right; and they did.  Man I miss her.


Sweet Suppertime, Raisin Filled Cookies


Old Fashioned Raisin Filled Cookies  from my momma Alta Dunsdon Chamberlain

Filling:
1 cup sugar
3 Tablespoons flour
1 1/2 cups raisins
1 cup boiling water

Cookie Dough
1 cup lard (shortening to those of us who don't have a pig handy)
1 cup sugar
1 egg
1 teaspoon vanilla
3/4 cup milk
3 1/2 cups flour (plus some for rolling)
1 teaspoon baking soda
2 teaspoons baking powder
1/2 teaspoon salt

Cream shortening (lard) and sugar, add egg and beat well.  Add vanilla to milk and set aside.  Sift flour, salt, baking soda and baking powder together in another bowl and alternatively add dry ingredients and the milk mixture to your creamed sugar/shortening/egg mixture.  Mix well.  
Roll dough very thin on a well-floured cloth and cut into rounds.  ( I used an old tuna can)  Place a teaspoon or more of the raisin filling on half of the rounds, top with remaining rounds and press edges together. 
Bake at 375 for 12 minutes, until edges turn golden.  Do not overbake.

Note:  For fun I filled a few with raspberry jam and a another with Nutella.  Then, just because I couldn't help myself, I added a glazing to a few and they turned out so pretty.